


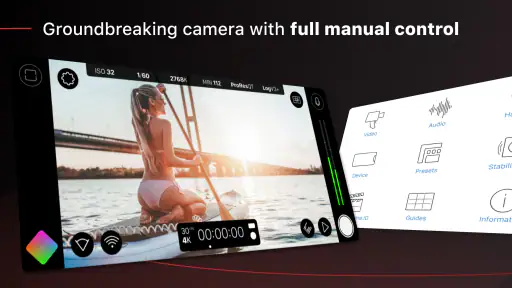
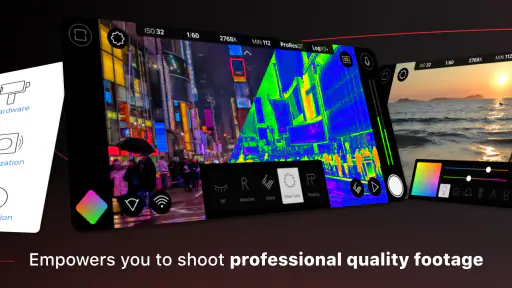
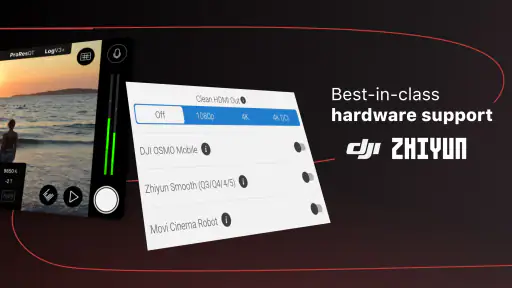
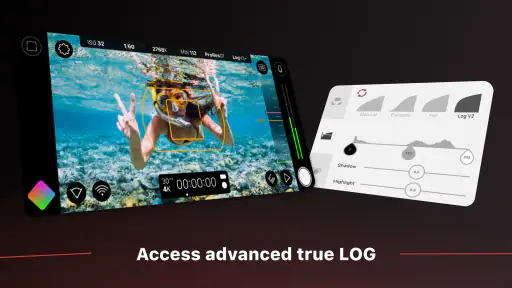
Filmic Pro: Mobile Cine Camera is the kind of photography app I would suggest to someone who has outgrown the automatic camera on a phone but is not ready to carry a dedicated camera everywhere. It turns mobile video recording into a more deliberate process, with the emphasis placed on control rather than instant convenience. That difference is important: you can get more consistent footage, but you also have more decisions to make before pressing record.
My first impression is that this is not simply a filter app with a cinematic label. It is built for people who want to think about exposure, focus, framing, and movement while recording. The store presents it as a professional choice associated with Oscar-winning directors, but I found the real appeal more practical than glamorous. It gives a phone user a more serious filming workflow, provided they are willing to learn where the controls are and accept that manual control can slow down a spontaneous shot.
It is a free photography app from Bending Spoons, available for an Everyone audience. The current release is version 7.6.4, and the app has passed the one-million-install mark. Those figures suggest that it has reached well beyond a niche group of filmmakers, although its average rating of 2.3 from roughly eighteen thousand ratings is a useful warning to approach it with realistic expectations. This is an ambitious tool, not necessarily the easiest camera for every phone owner.
What to expect before you record
The biggest change compared with a normal phone camera is the mindset. A standard camera app usually tries to make the correct decision for you. Filmic Pro asks you to take responsibility for the shot. That can be rewarding when you are filming an interview, a short scene, a travel sequence, or a carefully composed social video. It can also feel excessive when you only want to capture a child running across a room before the moment disappears.
I would not install it expecting an automatic improvement to every clip. A manual camera cannot rescue poor lighting, distracting backgrounds, shaky handling, or weak composition. What it can do is reduce the unpredictability caused by a phone constantly changing its exposure or focus while you record. When the subject and lighting are changing in a controlled way, that extra stability is often more valuable than a collection of decorative effects.
The app sits between two familiar alternatives. The built-in camera is faster and usually better for casual snapshots or urgent moments. A traditional camera offers deeper physical control and, depending on the model, more room for lenses and accessories. Filmic Pro occupies the useful middle ground: I can keep using the phone I already have while making more deliberate video decisions, but I still have to work within the phone’s camera hardware and the app’s learning curve.
That trade-off also explains why I would not recommend it automatically to every first-time user. If your priority is one-tap recording, automatic scene handling, and minimal setup, the default camera is probably the better choice. If you want to understand why one clip looks flat, overexposed, or inconsistent and you are prepared to adjust the camera rather than just retake the shot, this app makes much more sense.
Installing it without overthinking the first session
The app is free to install, while in-app purchases range from $0.99 to $59.99 per item. I would begin by treating the free installation as a trial of the workflow rather than assuming that every advanced possibility will be part of the basic experience. That approach keeps the first session simple: learn the camera interface, make a short test recording, and decide whether the control style actually suits you before spending anything.
It runs on operating systems from version 9 onward, which makes it accessible to many older devices. Still, compatibility does not mean that every phone will feel equally comfortable. Camera hardware, screen size, processing ability, storage, and the physical position of the phone’s lenses all affect the experience. Before planning an important shoot, I would test the exact device I intend to use, especially if the recording will be long or the scene will move between bright and dark areas.
On the first launch, I recommend resisting the urge to explore every visible control at once. Hold the phone in the orientation you plan to use, choose a simple subject, and spend a minute identifying the main focus and exposure adjustments. The goal is not to master the entire interface. The goal is to know how to make the image brighter or darker and how to keep the important subject from losing focus.
A useful preparation habit is to clean the lens and check the background before touching the controls. Manual settings cannot compensate for a fingerprint across the lens or a bright window directly behind your subject. I also like to decide whether the shot will be static or moving before recording. That choice affects how much attention I can give to the screen while filming and whether I should prioritize a locked composition over constant adjustment.
Your first meaningful success: one controlled clip
For a first test, I would film a person sitting near a window or a small object on a table. Choose a scene with one clear subject and moderate movement. Start the recording, adjust the image until the subject looks properly exposed, and then make a small change in the composition. Stop after a short clip and watch it immediately. This simple exercise teaches more than browsing through menus because it reveals whether your adjustments remain useful once the phone is actually recording.
My preferred beginner exercise is an indoor interview-style shot. Place the subject slightly away from the wall, keep the phone steady, and ask the person to speak for a few sentences. Watch the face rather than the background. If the face becomes too bright when the subject moves, or the focus jumps to something behind them, the problem becomes easy to understand. You can repeat the same sentence while changing one control at a time, which makes the result much less confusing than experimenting during a real conversation.
Another good first success is a short walking sequence. Begin with a stationary view, then move slowly toward a subject while keeping the framing consistent. The point is not to create a finished film immediately. It is to discover how much attention the app demands when your hands, subject, and exposure are all changing. I found that this exercise quickly shows whether I need a simpler setup for spontaneous filming or whether I enjoy the extra involvement.
The most useful beginner habit is to change one setting at a time and review the result immediately. If you alter focus, exposure, framing, and movement together, you will not know which decision helped or caused trouble. A controlled test also prevents a common mistake: assuming that a more manual-looking interface automatically produces a more professional image.
Why exposure and focus deserve separate attention
Many new users treat brightness and focus as one problem because both can make a subject look wrong. They are not the same. A face may be sharp but too dark, or bright but soft. When I separate those decisions, the camera becomes easier to understand. I first decide what must remain clear, then I adjust the brightness around that subject rather than chasing the overall appearance of the screen.
This matters most in scenes with strong contrast. Imagine recording someone beside a bright window. An automatic camera may keep changing its interpretation as the person moves. A manual approach lets me choose whether the face or the window matters more. Neither choice is universally correct; it depends on the story of the shot. For an interview, I would usually protect the person’s face. For a silhouette, I might accept a darker subject deliberately.
Focus also requires patience. If the subject is moving toward the phone, a fixed focus decision may eventually become wrong. If the subject is still and the background is busy, allowing the camera to decide continuously may create distracting shifts. The right choice depends on the scene, which is why I consider Filmic Pro more useful for planned shots than for unpredictable moments.
Before recording an important clip, I would make a short rehearsal and watch for changes that are easy to miss while looking at the live screen. A focus shift can be subtle during filming but obvious during playback. The same is true of exposure changes caused by a person walking past a light source. This rehearsal is one of the simplest ways to make the app feel reassuring rather than intimidating.
Common confusion during the first few uses
The first confusion is usually the number of visible controls. A regular camera hides most decisions, so a more advanced interface can make a user feel that every icon requires immediate study. It does not. I would mentally divide the screen into three jobs: compose the shot, control what is sharp, and control how bright it appears. Everything else can wait until those basics feel natural.
The second confusion is expecting a manual setting to remain perfect in every environment. A setting that works beside a window may look poor under indoor lighting or outside in direct sun. That is not a defect unique to this app; it is the cost of choosing the settings yourself. The practical solution is to create a quick check whenever the lighting changes instead of assuming that the previous setup still applies.
A third source of frustration is judging the image only from the live preview. Phone screens can make footage appear more impressive or more balanced than it will feel during playback. I always recommend reviewing a clip with sound and motion, not just pausing on a single attractive frame. A shot can look cinematic while still being too dark, poorly timed, or difficult to follow.
There is also a temptation to copy settings from online filmmaking advice without considering the scene. I would avoid that during the first week. A setting is not a magic recipe. The phone model, available light, subject movement, and intended platform all matter. Filmic Pro gives you control, but control is useful only when it is connected to a clear visual decision.
A realistic everyday workflow
Consider a simple weekend scenario: I want to record a friend demonstrating how to prepare a recipe in a small kitchen. With the default camera, I might begin recording and discover later that the bright counter has caused the person’s face to look too dark, or that the focus keeps moving between the hands and the background. With Filmic Pro, I can spend a little time before the demonstration deciding which part of the scene deserves priority.
I would first frame both the face and the work surface, then make a short test while the friend moves their hands as they will during the recipe. If the camera keeps favoring the background, I would correct the focus behavior before the real take. If the window changes the brightness, I would adjust the exposure while watching the face. I would also keep the phone position stable, because manual control is not a substitute for a steady composition.
The benefit is not that the finished clip suddenly looks like a cinema production. The benefit is consistency. The viewer can follow the person and the action without being distracted by repeated brightness changes or unexpected focus shifts. For a cooking demonstration, a craft tutorial, a school project, or a small business video, that consistency can matter more than an elaborate visual style.
The cost is time. If the friend is ready to begin immediately, the preparation may feel intrusive. This is where the built-in camera can be the smarter tool. I would use Filmic Pro when the recording is important enough to justify a rehearsal, not as a rule for every video I take.
Where the app earns its place
Its strongest use case is controlled mobile filmmaking. Interviews, short narrative scenes, product demonstrations, travel sequences, and educational clips all benefit from a camera that lets me make intentional choices. The app is also useful when I need multiple shots from the same setting to look related. Consistency becomes easier when I am not leaving every major decision to an automatic system.
I also see value for creators who want to learn camera language. Using the app can make exposure and focus feel less abstract because the consequences appear immediately on the phone screen. That hands-on feedback is more useful than reading a definition and hoping it makes sense later. A beginner who records short tests and compares them carefully can build practical understanding without buying a separate camera first.
On the other hand, I would skip it for quick family moments, fast-moving pets, or situations where missing the event matters more than controlling the image. A default camera’s speed is a real advantage. I would also look elsewhere if my main interest is still photography rather than video-oriented control, because the app’s appeal is strongest when I am shaping a moving sequence rather than capturing a single casual image.
The rating of 2.3 is worth keeping in mind when setting expectations. It does not tell me exactly which experience every reviewer had, but it does suggest that the app may create friction for a noticeable part of its audience. My own conclusion is that the friction comes with the territory: an advanced camera can feel less friendly than an automatic one. Beginners should give it a fair trial, but they should not feel obligated to keep it if the interface slows down every recording.
What to do after the first successful clip
Once the basic exercise works, I would build a repeatable routine instead of immediately chasing a dramatic visual style. Record the same subject in two lighting conditions, make one stationary clip and one moving clip, and compare them. Note which decisions were easy to repeat and which required constant attention. This tells you whether the app fits your personal way of filming better than a list of advertised capabilities ever could.
Next, create a short sequence with a beginning, middle, and end. For example, film a person entering a room, performing one action, and leaving the frame. Keep the phone position and visual priority clear. This teaches an important lesson: a professional-looking result depends on coverage and timing as much as on camera controls. Filmic Pro can help each shot behave predictably, but it cannot decide what the audience needs to see.
I would also establish a storage and review habit early. Short tests are easy to ignore, but they are where mistakes become useful information. Watch them on the same device you will use for editing or sharing, and pay attention to whether the image remains understandable when it is not paused. If a clip is technically controlled but visually dull, change the lighting or composition before reaching for more settings.
For users considering an in-app purchase, my advice is to wait until you can name the limitation you want to solve. Do not pay simply because a control looks advanced. First decide whether you need that control for a real project and whether the current workflow already feels comfortable. The available purchase range extends from small items to substantially higher-priced options, so a deliberate decision is more sensible than exploring by impulse.
My recommendation for a first-time user
I would recommend Filmic Pro to a patient phone owner who wants more predictable video and enjoys learning through practice. Start with one subject, one light source, and one short recording. Learn how to keep the important area sharp and how to prevent brightness from drifting. Those two skills provide a meaningful first result without turning the first session into a technical course.
I would not recommend it to someone who wants the fastest possible camera or who rarely reviews clips after recording. The app rewards preparation, and its control-oriented design can become unnecessary work for casual filming. In those situations, the usual phone camera is not an inferior choice; it is simply better matched to the job.
After using it, I see its value less in the promise of instant cinema and more in the ability to make repeatable decisions on a phone. That is a genuine advantage for interviews, tutorials, planned social videos, and small creative projects. The free entry point makes it reasonable to test, while the learning curve and optional purchases mean I would only go deeper once the basic workflow has proved useful.
My honest advice is to judge the app by your second or third controlled clip, not by your first glance at the interface. The first glance can be busy, but a short rehearsal with a clear subject reveals whether manual filming helps you. If it does, Filmic Pro can become a valuable mobile camera companion. If it does not, returning to the simpler camera is not giving up; it is choosing the tool that lets you capture the moment with less friction.


